Element Desktop Profiles
If you are using the Element Desktop application for Windows OS, you can create multiple profiles to manage different accounts or server configurations following the instructions below.
Creating a New Profile
- Locate the Element Desktop application shortcut on your desktop or in the Start menu.
- Open the folder containing the Element Desktop application shortcut.
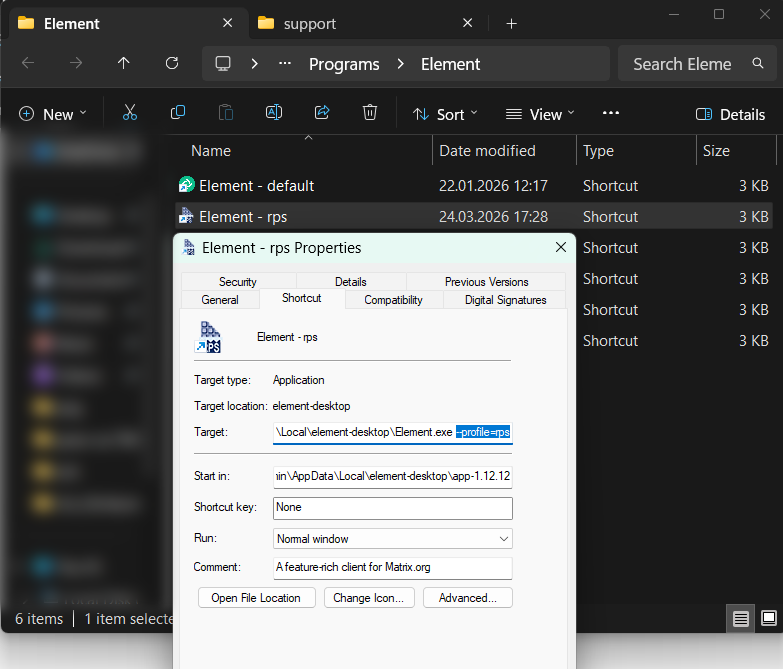
- Right-click on the Element Desktop application shortcut and select “Properties” from the context menu.
- In the Properties window, navigate to the “Shortcut” tab.
- In the “Target” field, append the following command-line argument to the existing target
--profile=<profile_name>Replace <profile_name> with a unique name for your new profile (e.g., "evh").
- Click “Apply” and then “OK” to save the changes.
The final value for the “Target” field should look something like this:
C:\Users\Username\AppData\Local\element-desktop\Element.exe --profile=evhYou may create multiple shortcuts with different profile names to manage various accounts or server configurations as needed.